.JPG)










I am Guest Blogging over here at U create today!! Come check it out!
Also you can find a tutorial for the Painted Glass Window that I made... over there also!!

Happy Crafting!!!
P.S. Thanks again Kari!!

P.S. Thanks again Kari!!









 What father wouldn't love a pair of new working gloves??? I just stuffed the ones I am giving with their favorite candy bars and candy!! Or...stuff them with whatever you think your dad or hubby would like!! And of course...I LoVe the tie and shirt card I saw on here ! Thanks for the idea!! Have FuN!!


 My kiddos think these are pretty CoOL! I think they will get used a-lot this summer. They even love to lay them all out... in the house... and sit on them when they are watching TV.
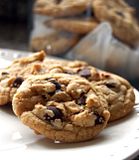
 Y*U*M*M*Y!!!
I am a HUGE cookie dough fan..so when I saw this I was in LoVe! :)
I found this on Big Red Kitchen !! You only need 3 ingredients to make this:
(optional) chocolate syrup
The instructions look very simple...so I think I can handle this one! I'm getting hungry just thinking about it!
For the complete recipe and instructions for this yummy pie go here!!
Thanks Robin!!


 .
. Instead of using the close clasp ends...I just tied a bead at one end, and made a loop at the other. Super Easy!! HaVe FuN!!
Erika @ Little Miss Crafty Pants
Mitzy @ One Day When I Have Time
Dotty @ Totally Tutorials
Amy @ The Idea Room
Jill @ Controlling My Chaos
Kari @ Ucreate
Ashley @ Make it & Love it
Andy @ Poppies at Play
Misty @ Creative Itch
Char @ Crap I've Made
Naptime Journal @ Naptime Journal
Cathy & Monica @ FabuLESSly Frugal
Meredith & Molly @ Tuesdays with Molly
Mique @ 30days
Mrs D. Lightful @ Mrs. D. Lightful


I found this idea on YouTube and it is from the DIY Network show called: "Creative Juice"!
Scroll down and hit pause on the music before you play video.
These were sooo easy and the turned out so cute!!! On some of the ones I made...distressed the edges with ink.
Another option you could do instead of using Diamond Glaze...is that you could pour resin over the top. If you decided to do that... you could prop the washers up on toothpicks so that the resin can drip off. When they were completely dry... I pried the stuck toothpicks off... and sanded the leftover resin on the back... OFF... till it was smooth. Resin gave them a very smooth, raised glassy look.
Also another option... that my daughter really liked... is using a glitter glaze. I found some of this over by where they keep the glue and resin at Michaels . This really gave it a "Bling" look to the washer. You could do so many different things with these... so just experiment... and have fun with it! These might be fun to make at either a Mother/Daughter activity...or Girls Camp!!





 Aren't these AdoRaBLe!! I found these on Crazy Crafty Cousins ! They have a ton of cute crafty ideas and recipes. We are FOR SURE going to make these! Check them out here !
 These are made out of 1/4" plywood. I just drew( what I thought looked like a flower), and cut them out. The leaves were scrap wood that was leftover from cutting out the flowers. The stems could be made out of wood lath, or a sturdy yard stick (Home Depot has good ones for cheap) that you could sand down so you can't see the measurements. Then paint.
 My daughter, who is turning into a little CraFter herself, had fun helping me with the painting.
 Once they were done drying, I sanded the tops, and the edges down.
 Then, I wiped stain around all the edges to give it that older look.
 Then I used wood glue to hold the pieces together.
 I think they turned out really cute! It thought would be really cute to take my kiddos pictures with them for a fun spring look!