Hello to Creative Crate readers! This is Ruth and Sammy from
Scraps N' Strings and we are so excited to be doing our blog spot with Stacie! We figure we had better introduce ourselves a bit before we start.
I'm Ruth and I am a stay at home mommy of 2 (3 and 1) and a part-time photographer, you can see my work
here. I enjoy making "stuff" and taking pictures of them! I especially love to sew and like to break out the Modge Podge. I love anything that is quick and simple! After I got married, I started crafting with my sister-in-law Sammy as a way to make our homes cute without spending a lot of money.
My name is Sammy and I have 2 darling little boys, 2 and 10 months. I'm a stay at home mom and I like to spend my zero amount of free time trying to be crafty and beautifying my home. One of the first things my husband said to me when we bought our home was, "You want to put crafts up, don't you?" So that's what I've done. And now we've decided to share some of our ideas with you! We've got a little bit of everything on our blog, from baby and home tutorials to recipes. So now on to the tutorial:

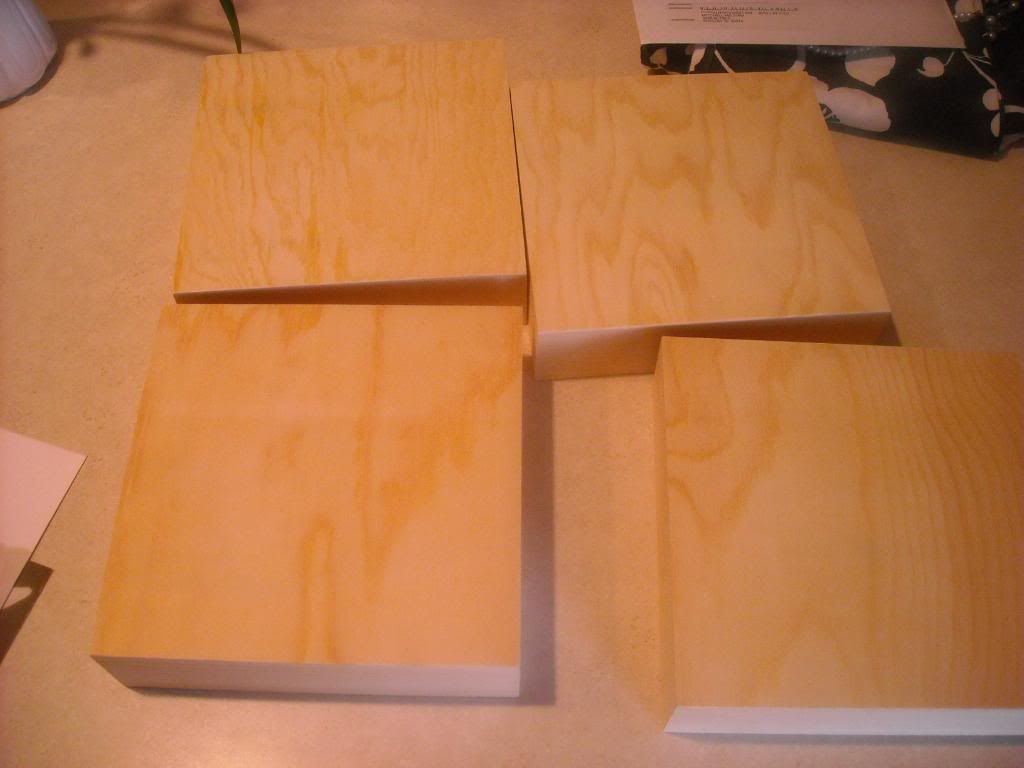
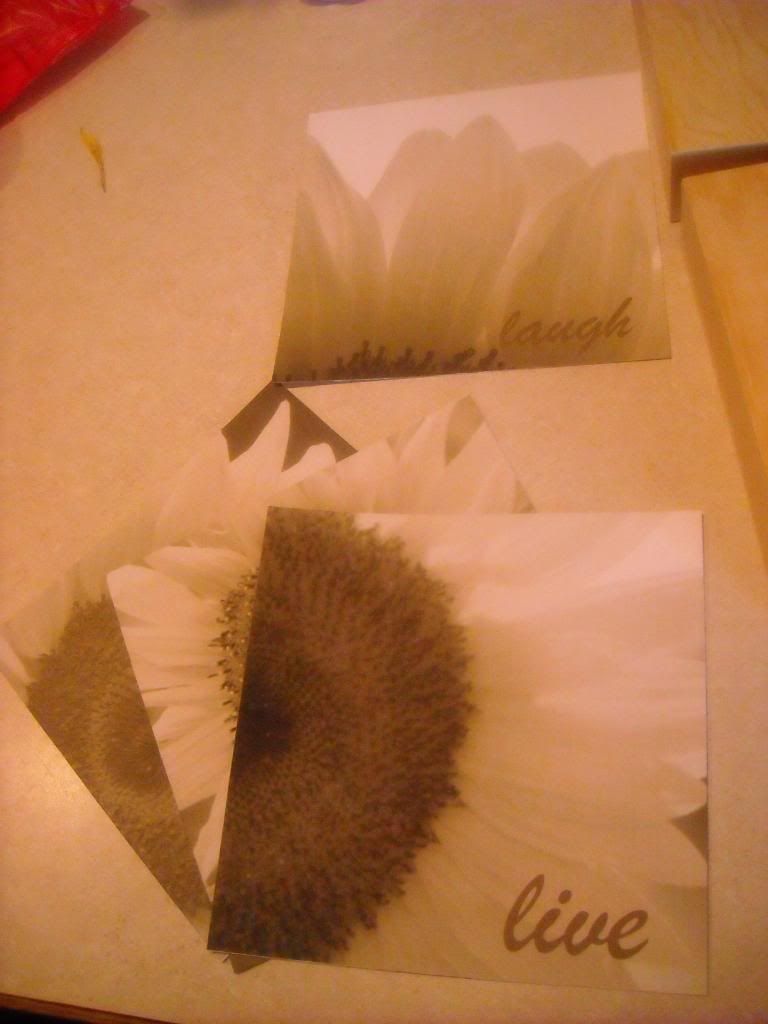
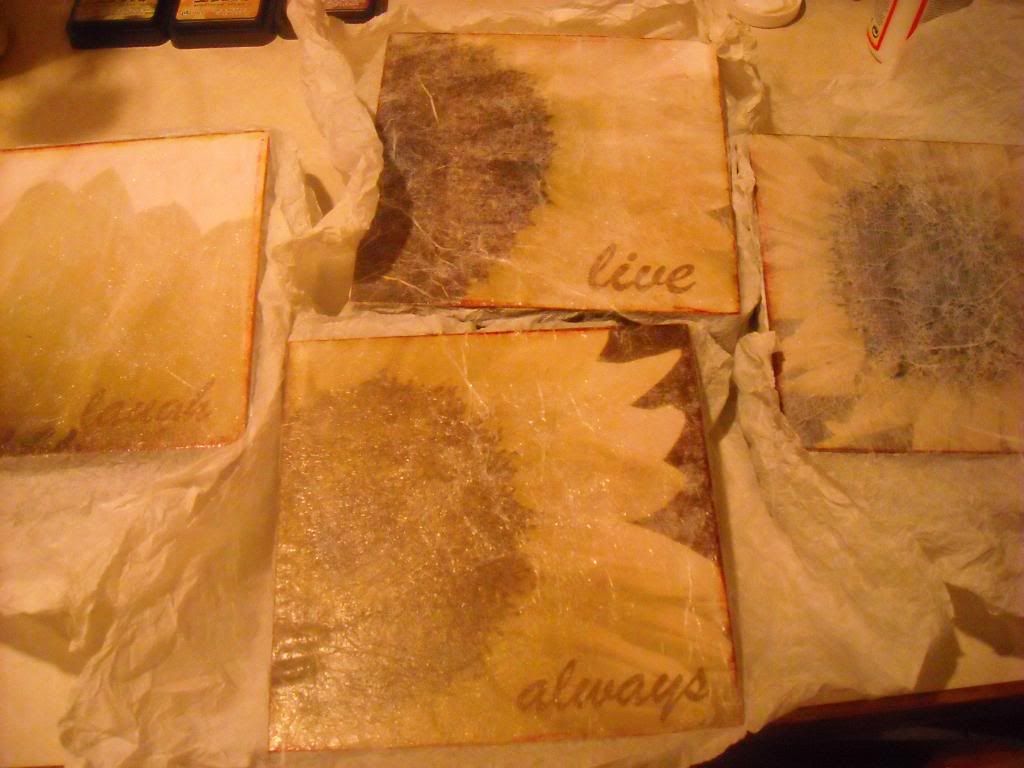
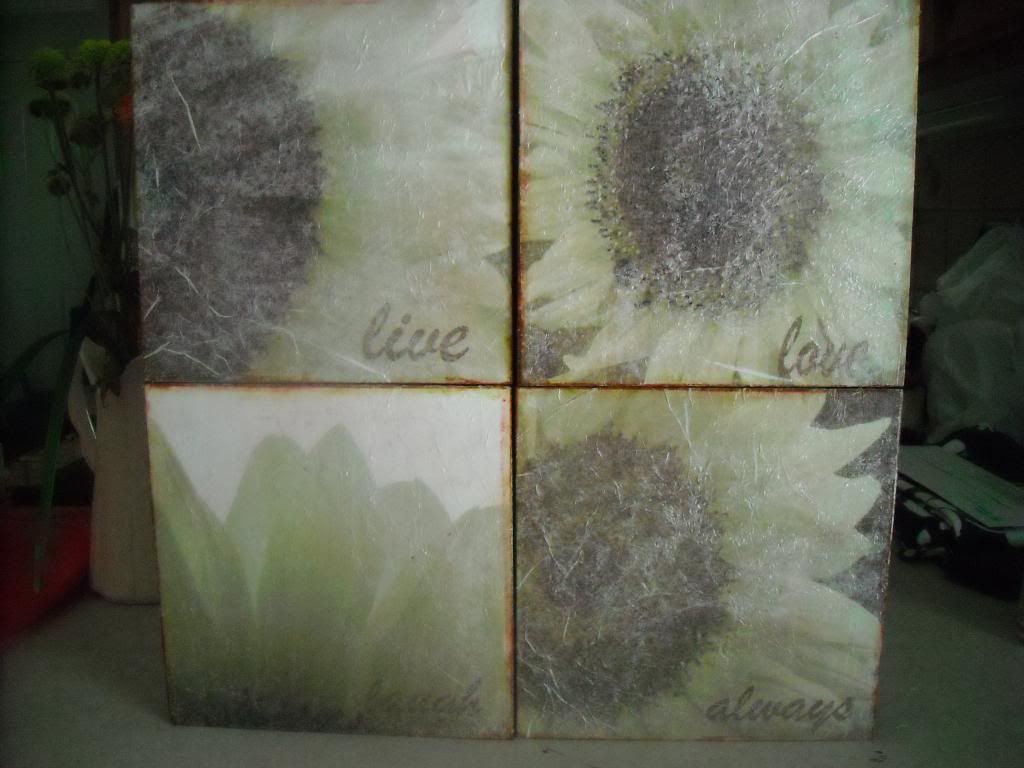
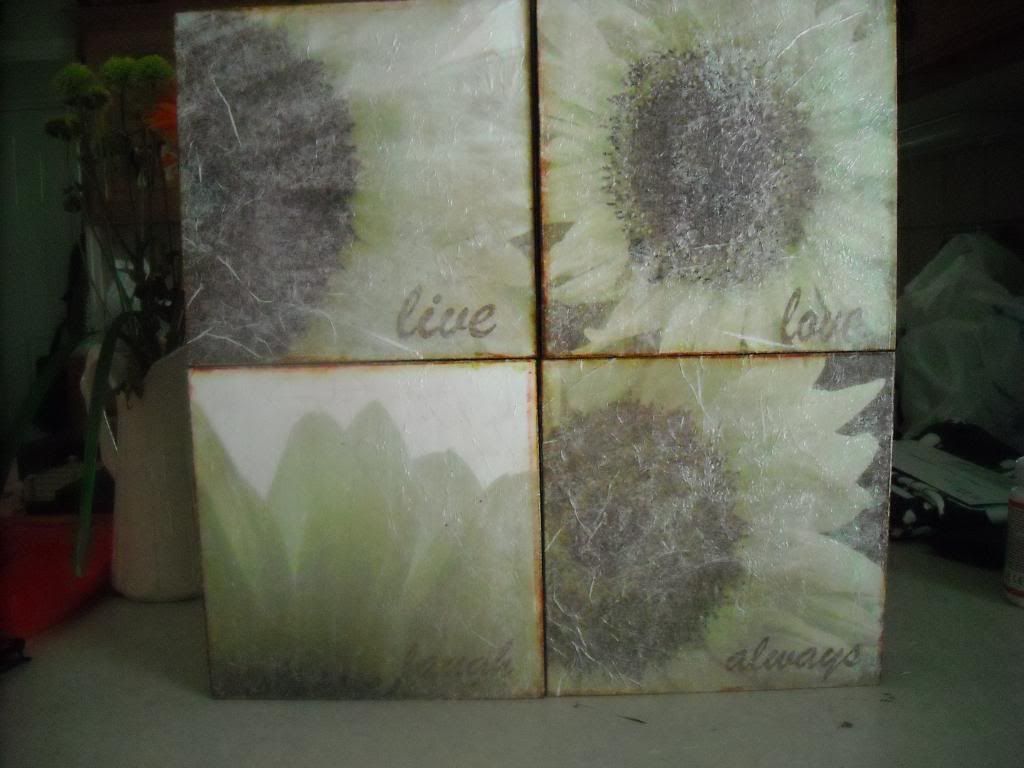
I am so in love with these and they were so super easy. First thing that you are going to need is 4 8X8" wooden wall boxes. I got mine at Porter's for $4.99. You can go bigger if you want but I figured these would be the easiest sizes to print pics for. You also need to find 4 flower pictures that you like. I googled mine so I don't have the link or anything for them but you can do the same and find pictures that you like. I then changed the color to a light sepia and added text to each picture (live, laugh, love, always) and put them in the bottom right of each picture, and then printed them onto cardstock before cutting the paper down to 8X8" squares.
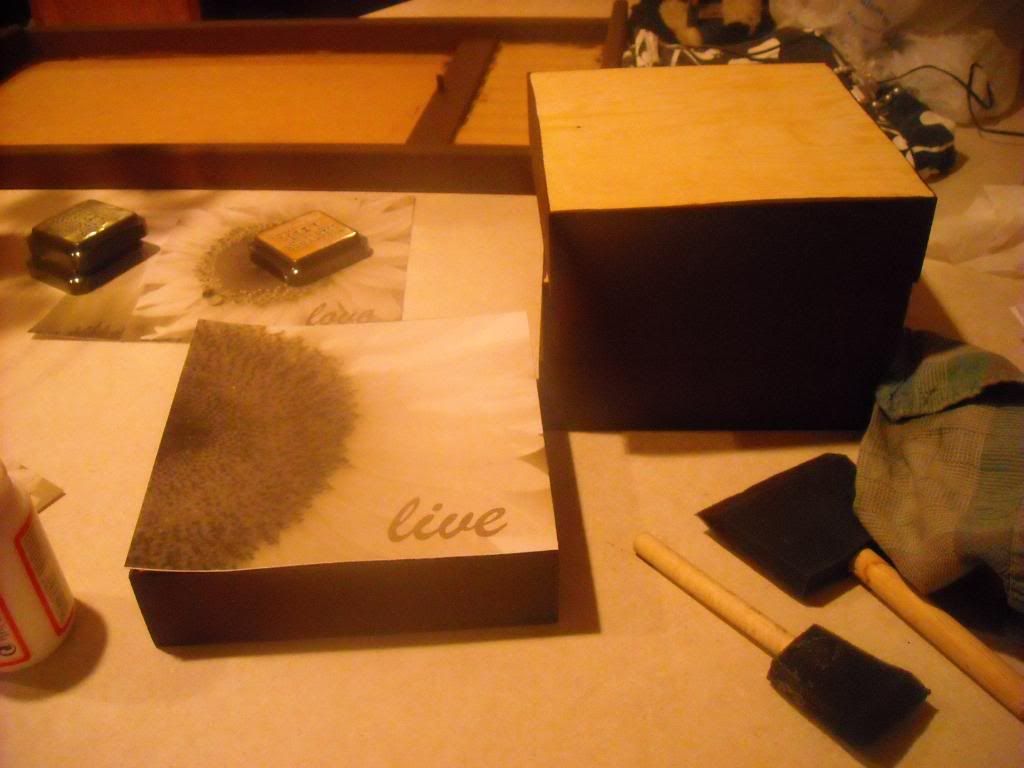
The next thing I did was paint the edges of the boxes a dark brown color and then used the glossy mod podge to attach the pictures onto the tops of the boxes.
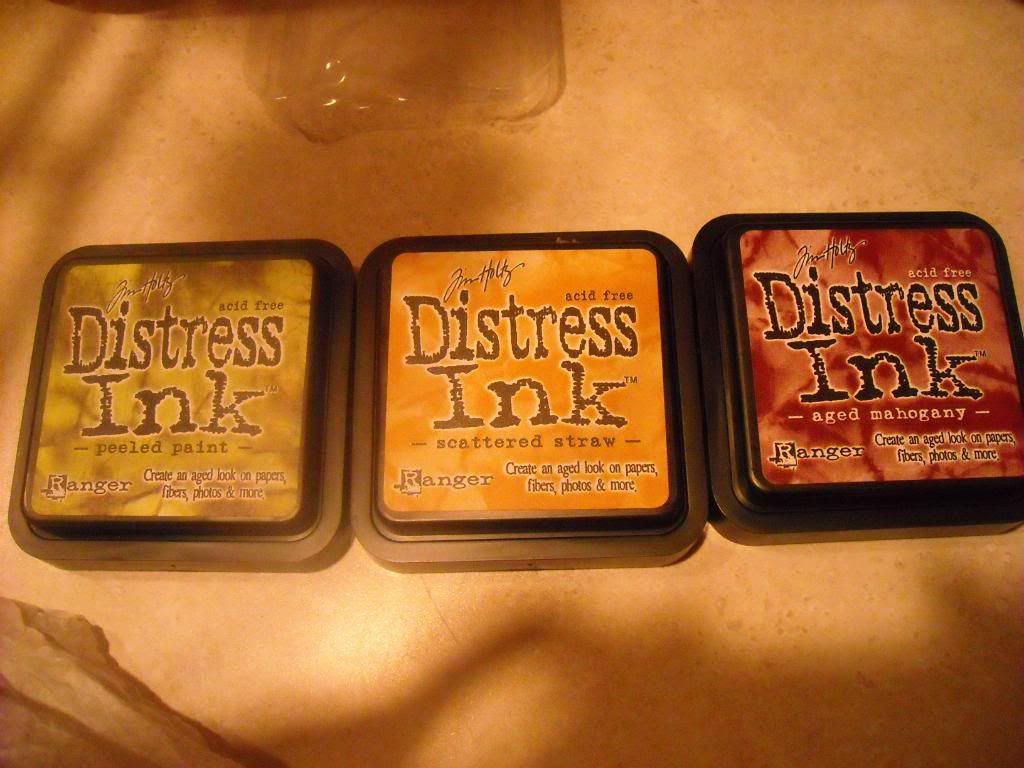
After I got all of the pictures attached, I took three of my fave distress inks and used a rag to rub some color around the edges of each box, making sure that each color stood out.
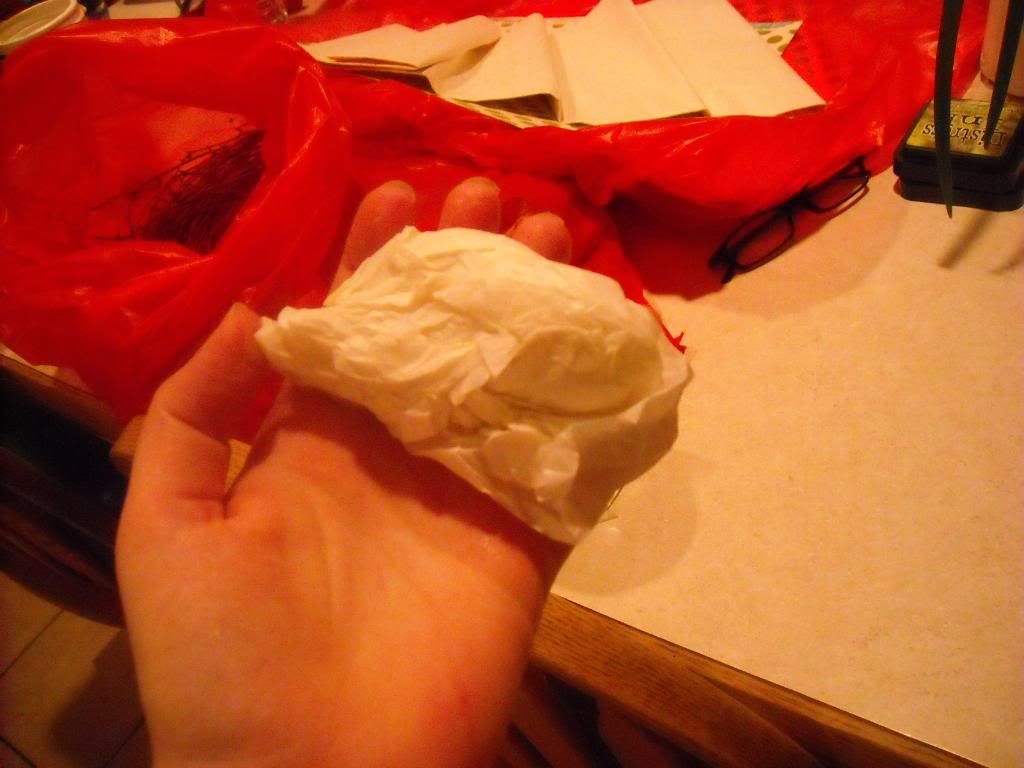
This next step is what made me love these boxes. I wanted them to have an aged look, so I took some white tissue paper and crumpled it into a ball
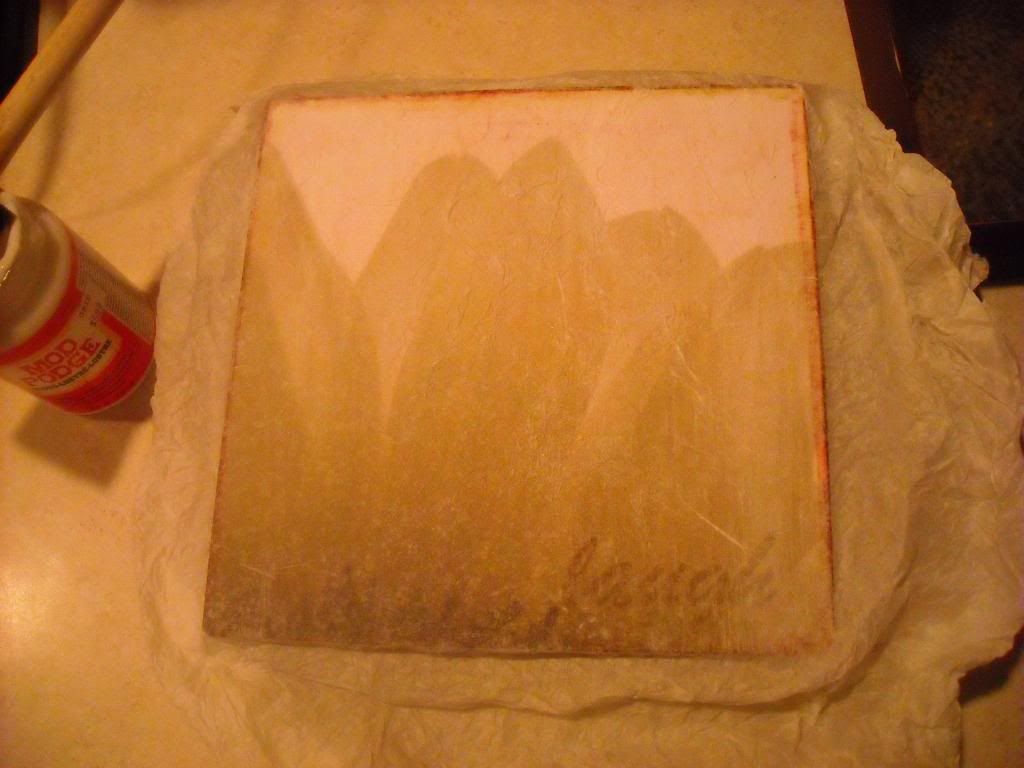
then uncrumpled it and put a thin layer of mod podge on the pictures and layed the tissue paper over the box. Then flatten the tissue paper over the top. It should look wrinkley and old. After it is all pressed down put another layer of mod podge over the top of the tissue paper. Make sure that you use a lot of mod podge to help the tissue paper get a sort of see through look.
Once the mod podge dries, peel off the excess tissue paper and use a sharp knife around the edges to make sure that all of the excess comes off.
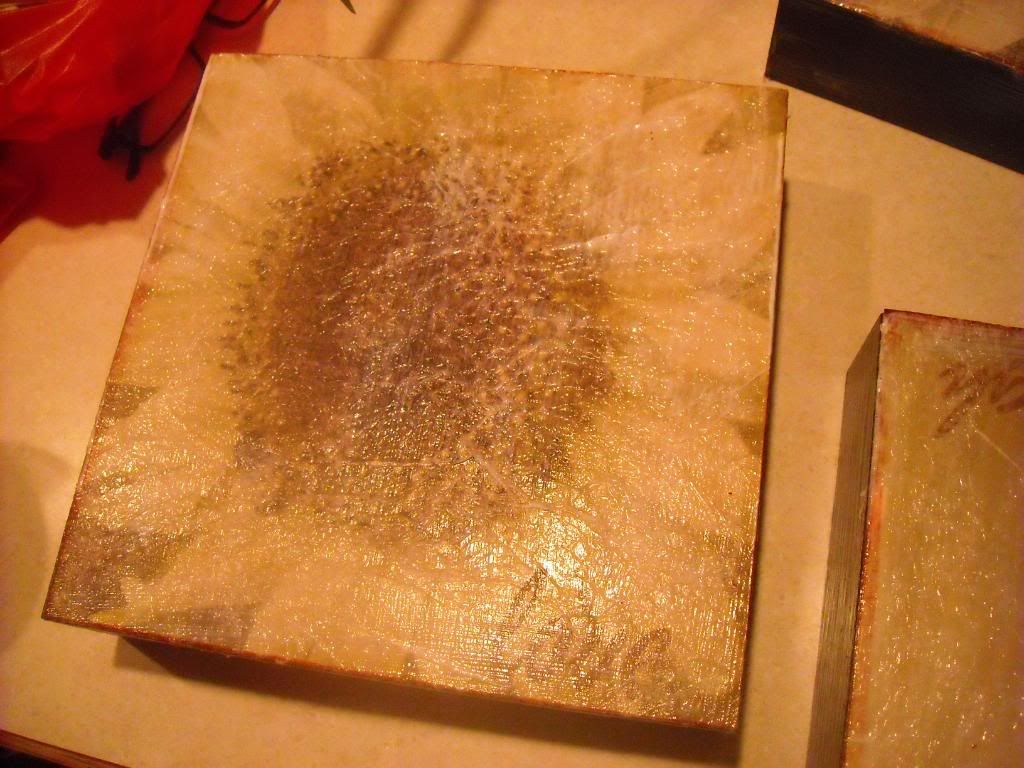
Last step is to apply one more layer of mod podge over the top and around all sides to that the finish has a nice shine to it. Let them dry overnight and wha-la!
These babies are going straight up on the wall in my room, but don't you have a cute little shelf or empty wall space in your home that these would be perfect for? I thought so...
Thanks, Stacie, for swapping with us today! Don't forget to check out the rest of our projects at Scraps N' Strings!
Aren't they FuN?! And...what a great project!
Thanks Sammy & Ruth!
And...don't forget to link up those Mothers Day ideas!! :)

Have a great day!!


.JPG)


 and...how you can save a little {moolah} when it comes to fonts!! {Thanks to an awesome reader tip...I recently bought this...and LOVE IT!!}
 Sooo...go check it out HERE!!


-3.jpg)

 I bought my ring blanks @

 Then I used E-6000 to glue it on! So
  This project turned out to be a little over